This post summarizes the use of Swagelok® Tube Fittings, which are used extensively in the HYPER lab. If you’re already familiar with tube fittings, you may want to skip to the best practices at the bottom. Most of this guide is pulled directly from “An Installer’s Pocket Guide for Swagelok® Tube Fittings.” If you haven’t read this already, you should! We have several physical copies around the lab.
What is a tube fitting?
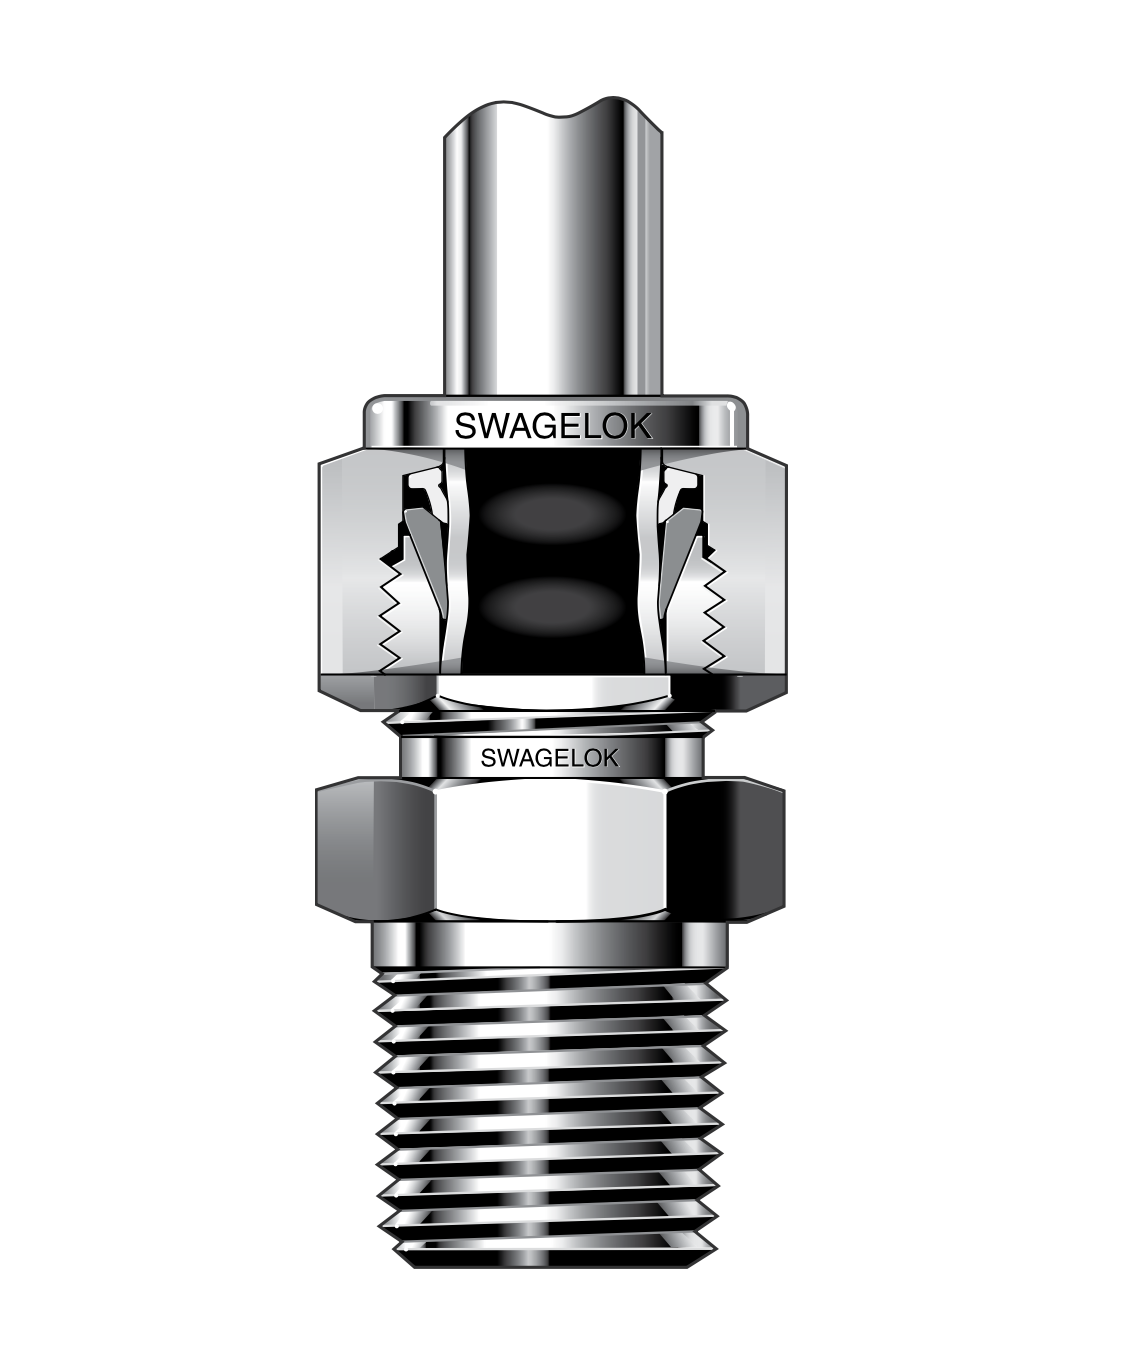
Swagelok® Tube Fittings are also referred to as Swagelok Fittings, Tube Fittings, or Compression Fittings. You’ll see similar fittings at the local hardware store, but beware – they aren’t the same! While both the hardware store variety of compression fitting, and the Swagelok fitting operate by swaging, or forming the tube around hard metal ferrules, the Swagelok fitting is a robust, double ferrule design whereas the hardware store variety is almost always a single ferrule design. In the above picture, you see a female nut with the two hard metal ferrules installed correctly to a male fitting body (in this case, an NPT adapter). The bends in the tubing around the ferrules signify the seal locations between the ferrules and the tubing.
First Installation: Swaging
Before Installing for the first time, ensure that the tubing and fitting are in good order. The tubing should be clean and free of scratches at the ends. The tubing should already be bent into the desired shape, and you should check for sizing to ensure proper fit (this insures we don’t waste nuts and ferrules by swaging onto the tubing before measuring). If you cut the tubing, be sure to clean the tubing with a burr-removal tool. The tubing end should be completely round and clear of burrs or dents.

The above steps point you through the process of swaging the nut ferrule onto a fitting. Be aware! While most of our fittings require 1-1/4 turns to swage, smaller fittings may require 3/4 turn. Make sure your tubing is all the way into the fitting body – you will not get a good seal if you don’t properly seat the tubing.
After your first installation (swaging the ferrules on the tubing) you can ensure proper tightening by using the gauging tool. HYPER lab has a gauging tool that can test our most commonly used fitting sizes. Try to insert the correct side of the gauging tool into the gap between the nut and fitting body. If you are able to insert the gauging tool into the gap, the fitting must be tightened further. If you cannot, the fitting is properly tightened. BEWARE: The gauging tool only works on the initial installation of the fitting. If you remove the tubing from the fitting and reseal, you are not guaranteed proper tightening with the gauging tool.
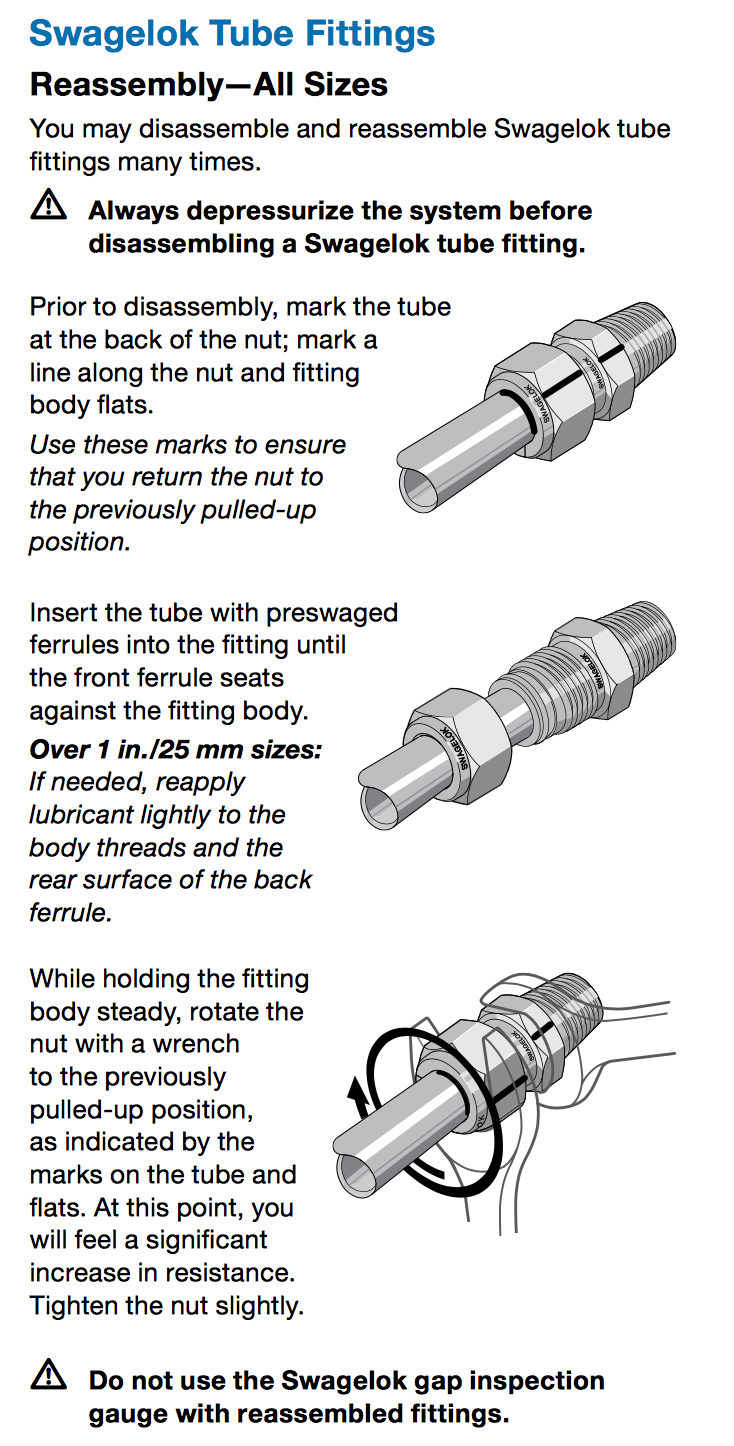
Reinstallation: When you have to disconnect and reconnect lines.
Before you disconnect a tube fitting, ensure that the system is depressurized. It is not recommended that you depressurize any system by loosening any fitting, including tubing fittings. Doing so could potentially shoot fittings and/or tubing across the room. Mark the fitting as indicated in the instructions below before taking the fitting apart.
Again, as stated above, the gauging tool will not help you to determine if a fitting you have resealed is correctly tightened.
Best Practices
The following list are best practices developed by members of the lab for working with tubing fittings.
Marking fittings
Always mark fittings before tightening (or loosening) the fittings. It will ensure that fittings are properly tightened, and will prevent over-tightening. This will increase the lifespan of our fittings and tubing. Clean fittings after finishing so your markings don’t get in the way for next time.
Hard to reach fittings
If the fitting body you’re trying to attach tubing to is in a hard to reach area, use a different fitting body to swage the tubing, then remove the tube from the fitting and install in location. In this case, you will not be able to use markings to help you reseal the fitting – tighten the fitting until hand tight, then tighten 1/4 turn more with wrenches.
Correct tubing thicknesses
The recommended tubing thickness for using fractional tubing fittings for stainless steel and copper tubing are given below. For gas service, it is recommended that you use a tubing thickness outside the shaded areas in the charts.


For other materials, or metric recommendations, please consult “An Installer’s Pocket Guide for Swagelok® Tube Fittings.”